Unfortunately I just can't get my cookies to be as thick as what my mom made for me growing up. Maybe cookies just turn out better when made in the midwest. I made half of this recipe and added 1/4 cup more flour and then chilled the dough for 15 minutes before cooking and that seemed to improve the thickness a bit.
I altered the recipe a bit by adding 1/2 cup peanut butter chips which only took these chocolate goodies to the next level (who doesn't love chocolate and peanut butter, except those who are allergic?!). My sister-in-law quickly stopped by our place the day after I made these cookies and she took one on her way out the door and right when she got to her car she texted me and said that these were her favorite cookies I've ever made! It was a great compliment and just shows you how delicious they are! ;)
Suggestions:
-Don't over cook! I only cook mine 8 minutes and mine were still soft and chewy the second and third day but I'm not sure about the forth... they were too irresistible to last that long in our home.
-Only cook one pan of cookies and save the dough already formed into balls in the fridge so that you can have fresh cookies in a few days after you eat (devour?) the first batch.
-You can also easily make pizookies by putting a ball of dough straight from the fridge into a custard cup and then onto a pan and cook for about 14 minutes. When done let cool for a few minutes and then use a hot pad to place the custard up on a plate and then top with ice cream and serve immediately. Nick and I really enjoy these! :)
INGREDIENTS
1 c (2 sticks) butter, softened
3/4 c granulated sugar
3/4 c packed light brown sugar
2 eggs
1 tsp vanilla extract
2 1/4 c flour
1/3 c cocoa
1 tsp baking soda
1/2 tsp salt
2 cups semi-sweet chocolate chips
DIRECTIONS
Preheat oven to 375 F.
In a medium bowl mix flour, cocoa, baking soda and salt. In a large bowl or mixer beat butter, sugars, and vanilla until creamy. Add eggs and beat well. Add flour mixture a little at a time and mix well. Add in chocolate chips and drop onto an ungreased cookie sheet using a cookie scoop.
Bake 8-10 minutes. Let cookie cool for a few minutes on the pan and then remove onto a wire rack.
Yield: 4 dozen
–Melanie
Showing posts with label Chocolate. Show all posts
Wednesday, April 3, 2013
Wednesday, March 6, 2013
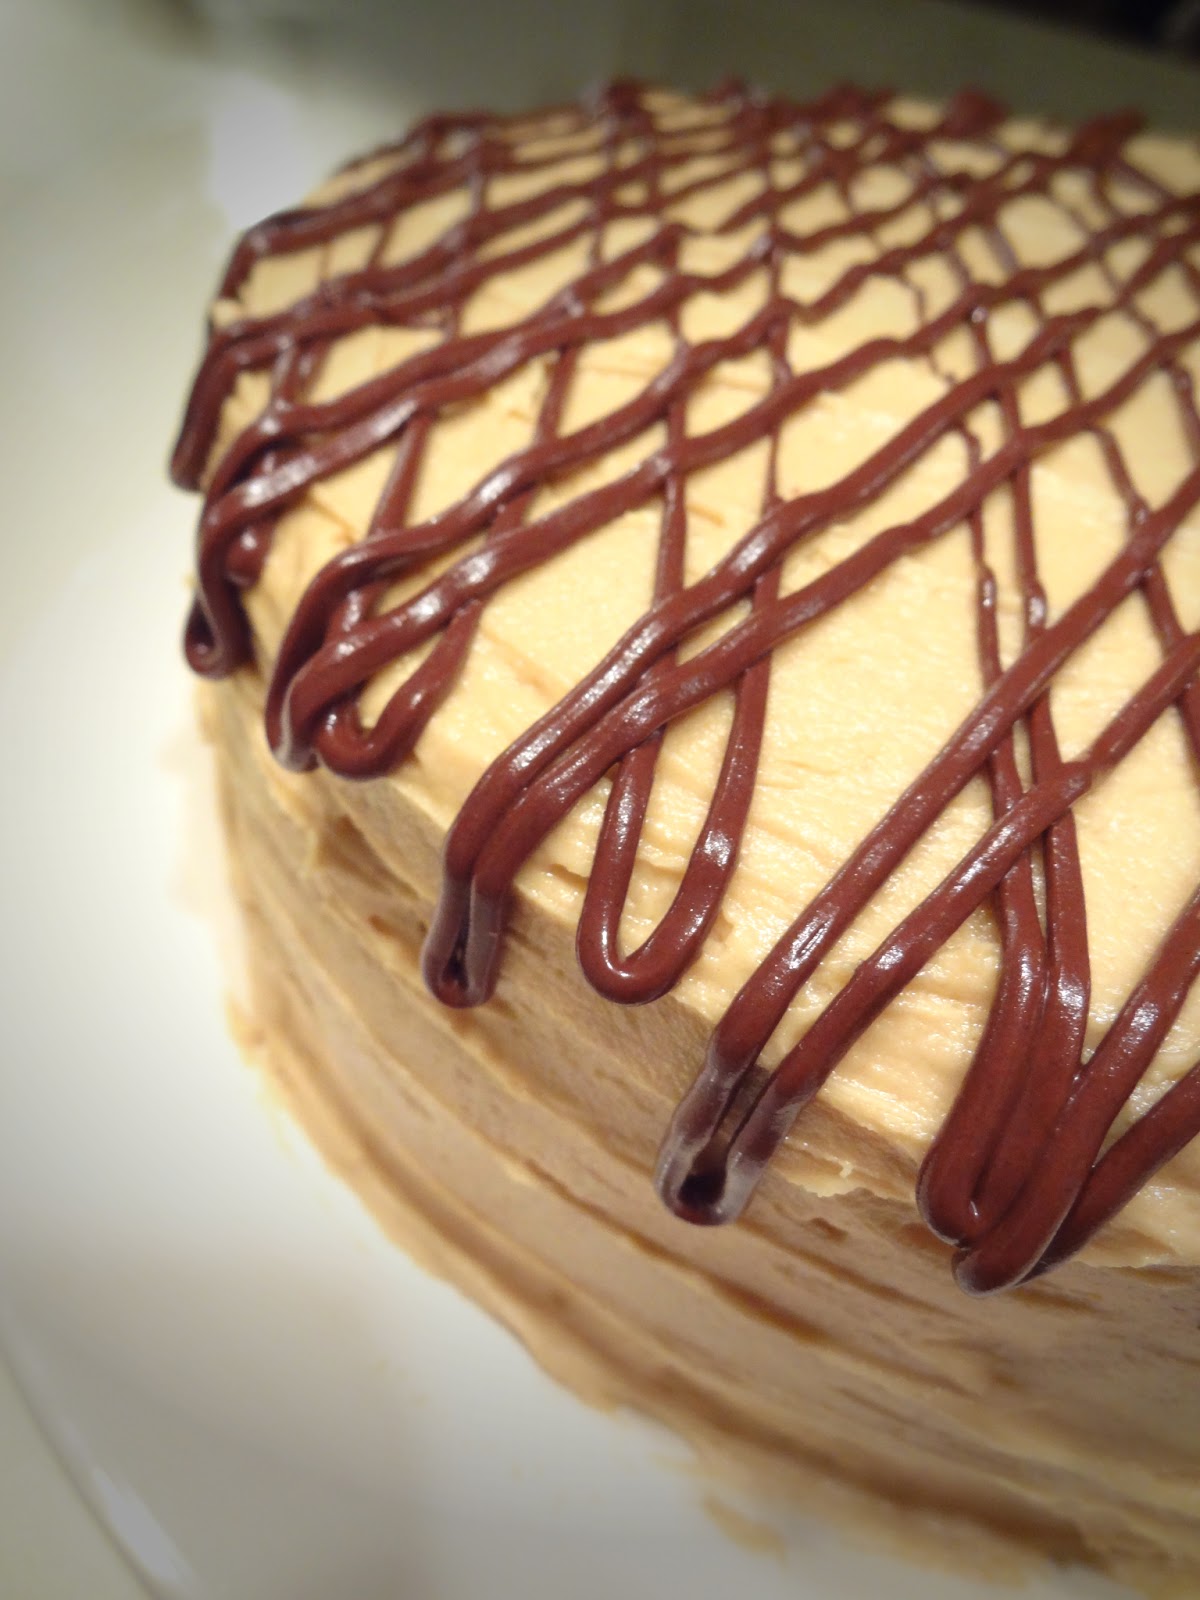
Chocolate Cake with Peanut Butter and Chocolate Frosting
Happy... day?! Usually cakes of this size are made for holidays, special occasions, or for large gathering but I don't have any of those as an excuse. Nick was in the mood for cake with peanut butter frosting and we decided to make a full recipe for the sake of pictures and for lots of leftovers and sharing with others!
At the beginning of my pregnancy I couldn't even stand the thought of sweets! Nick had to make himself dessert and he actually did a pretty good job. I was actually kind of excited that this pregnancy was going to help me change my eating habits but that only lasted the first trimester. I have definitely been indulging in desserts a little too much but I'm still a few pounds below what I should be so I should eat more cake right?! Well, I should probably choose healthier options. Don't worry I'm still eating pretty healthy and staying active.
This cake tastes a lot like my cupcakes because it has the same frosting so yeah, it's really good and you should try it. The cake part of the recipe is from one of Hershey's recipes but I think I like my cake recipe still a little better.
INGREDIENTS
Cake:
1/2 c cocoa
1/2 c butter
1/2 c shortening
1 c water
1 3/4 c all-purpose flour
2 c sugar
1 tsp baking soda
1/2 c buttermilk
2 eggs
1 tsp vanilla extract
Peanut Butter Frosting:
5 T butter, softened
1 c creamy peanut butter
3/4 tsp vanilla
1/4 tsp salt
1 c powdered sugar
1/3 c heavy cream
Chocolate Frosting:
1/4 c butter, softened
1/3 c cocoa
1/2 tsp vanilla
1 1/2 c powdered sugar
2 Tbsp milk
Chocolate Drizzle:
1/2 c semi-sweet chocolate chips
DIRECTIONS
Cake:
Preheat oven to 350 F. Grease two 9-inch round cake pans with shortening and then flour.
In a large bowl combine flour, sugar, and baking soda and set aside. In a medium saucepan bring the first 4 ingredients to a boil over medium heat being sure to stir often. Once it comes to a boil remove from heat and blend into the flour mixture. Mix in buttermilk, eggs, and vanilla. Pour batter into pans.
Bake for 30-35 minutes until toothpick comes out clean. Cool for 10 minutes and then remove from pans onto wire racks and allow to cool completely.
Place one cake on a plate or platter and top with chocolate frosting. Place the other cake on top. Frost the top and sides of the cake with the peanut butter frosting.
Peanut Butter Frosting:
–Melanie
At the beginning of my pregnancy I couldn't even stand the thought of sweets! Nick had to make himself dessert and he actually did a pretty good job. I was actually kind of excited that this pregnancy was going to help me change my eating habits but that only lasted the first trimester. I have definitely been indulging in desserts a little too much but I'm still a few pounds below what I should be so I should eat more cake right?! Well, I should probably choose healthier options. Don't worry I'm still eating pretty healthy and staying active.
This cake tastes a lot like my cupcakes because it has the same frosting so yeah, it's really good and you should try it. The cake part of the recipe is from one of Hershey's recipes but I think I like my cake recipe still a little better.
INGREDIENTS
Cake:
1/2 c cocoa
1/2 c butter
1/2 c shortening
1 c water
1 3/4 c all-purpose flour
2 c sugar
1 tsp baking soda
1/2 c buttermilk
2 eggs
1 tsp vanilla extract
Peanut Butter Frosting:
5 T butter, softened
1 c creamy peanut butter
3/4 tsp vanilla
1/4 tsp salt
1 c powdered sugar
1/3 c heavy cream
Chocolate Frosting:
1/4 c butter, softened
1/3 c cocoa
1/2 tsp vanilla
1 1/2 c powdered sugar
2 Tbsp milk
Chocolate Drizzle:
1/2 c semi-sweet chocolate chips
DIRECTIONS
Cake:
Preheat oven to 350 F. Grease two 9-inch round cake pans with shortening and then flour.
In a large bowl combine flour, sugar, and baking soda and set aside. In a medium saucepan bring the first 4 ingredients to a boil over medium heat being sure to stir often. Once it comes to a boil remove from heat and blend into the flour mixture. Mix in buttermilk, eggs, and vanilla. Pour batter into pans.
Bake for 30-35 minutes until toothpick comes out clean. Cool for 10 minutes and then remove from pans onto wire racks and allow to cool completely.
Place one cake on a plate or platter and top with chocolate frosting. Place the other cake on top. Frost the top and sides of the cake with the peanut butter frosting.
Peanut Butter Frosting:
With an electric mixer beat butter, peanut butter, vanilla, and salt together in a medium bowl. Slowly mix in powdered sugar and heavy cream and mix until smooth.
Chocolate Frosting:
With an electric mixer beat butter, cocoa, and vanilla together in a small bowl. Slowly mix in powdered sugar and milk and mix until smooth.
Chocolate Drizzle:
Melt chocolate chips in microwave for 1 minute in 30 second increments and stir until smooth. Put chocolate into a plastic bag and cut off the corner. Squeeze chocolate out over cake with a side to side motion letting it drizzle off on the sides.
–Melanie
Tuesday, February 19, 2013
Chocolate Mint Ice Cream Cake
| The finished product! |
| The yummy slices |
| The birthday boy and his cake. |
Ingredients
1 chocolate cake mix (I used Devil Food Cake)
1/2 gallon of mint chocolate ice cream softened
Mint Oreos crushed - I used about 1 row from a package
heavy whipping cream
sugar
4 oz semi sweet bakers chocolate squares
Mix cake according to box and bake in 3 9" round cake pans that are well greased. Bake and let cool. Layer the cake in the following order inside the spring form pan:
1 cake layer
1/3 softened ice cream
handful crushed oreos
repeat these layers
Cover cake and freeze overnight.
For the ganache topping:
Melt the chocolate squares with the heavy whipping cream, either in the microwave or on the stovetop. I prefer microwave because its so easy to burn the chocolate on the stove. Cook for 1 minute and stir. Repeat until the mixture is the right consistency to pour over the cake. I added almost a cup of cream, but I would add a little at a time until its right for your desired use. We also added some sugar to make it a bit sweeter. :)
Pour the topping over the cake after removing the spring form rim. Top with remainder of crushed oreos.
Easy and yummy! And this was so much cheaper than buying an ice cream cake from cold stone!
Enjoy! After the first day, we added hot fudge sauce to the slices for a little extra sweetness. Yes, we love chocolate! Hooray for Birthday cakes!! (and No, we didn't put any candles in this cake, haha!)
~Heather
Friday, January 25, 2013
Peanut Butter Chocolate Heart Cookies
I'm trying to take better pictures so I've read up on food photography and also got photo shop on the ipad. Sometimes it is hard to capture the deliciousness with a camera but hopefully my developing photography and editing skills will help.
This is the Peanut Butter Blossom Cookie but made with Hershey's heart shape chocolates (made for Valentine's day) instead of Hershey's kisses. This different shape of chocolate has taken these five stars cookies to 6 stars. Really?? Yeah... I know. Way good! I still think the kisses make the cookies look super cute but that tall point always made it a little difficult to bite into. The flat chocolate heart makes savoring this cookie with as many bites as one can take a cinch! (and I think the size of the heart is bigger than the kiss so more chocolate!) After valentines day Hershey's will only have its kisses so I'll try Dove chocolates.
Now the key to making these cookies super good is to not over cook them. Baking time depending on your oven and how big you roll the balls of dough. I set my timer for 8 minutes and then check them. I usually end up cooking them 9 minutes total. You know when they are done when they begin to slightly crack (the large cracking you see in the pictures happens when you push the chocolate in). It is also important that you press the chocolates in the cookies right away while the cookies are still on the baking sheet. Remove cookies onto a wire rack a few minutes later. (If you press the chocolate in while on the wire rack you'll push the cookie into the rack making a grid impression on the bottom of the cookies.)
–Melanie
Now the key to making these cookies super good is to not over cook them. Baking time depending on your oven and how big you roll the balls of dough. I set my timer for 8 minutes and then check them. I usually end up cooking them 9 minutes total. You know when they are done when they begin to slightly crack (the large cracking you see in the pictures happens when you push the chocolate in). It is also important that you press the chocolates in the cookies right away while the cookies are still on the baking sheet. Remove cookies onto a wire rack a few minutes later. (If you press the chocolate in while on the wire rack you'll push the cookie into the rack making a grid impression on the bottom of the cookies.)
–Melanie
Friday, December 14, 2012
Favorite Hot Chocolate
This hot chocolate takes a bit more effort than the "just add powder" kind but is so worth it! Great to drink on a cold winter night in front of the fire!
INGREDIENTS
1/2 cup sugar
1/4 cup Hershey's Cocoa
Dash salt
Pinch Pensey's Cinnamon
1/3 cup hot water
4 cups milk
3/4 tsp vanilla extract
DIRECTIONS
Mix sugar, cocoa, salt, and cinnamon in a sauce pan; stir in water. Cook and stir over medium heat until mixture boils; boil and stir 3 minutes. Stir in milk and heat. DO NOT BOIL. Remove from heat; add vanilla. Pour into mugs and add a large tablespoon whipped cream; sprinkle with cocoa or nutmeg to garnish!
INGREDIENTS
1/2 cup sugar
1/4 cup Hershey's Cocoa
Dash salt
Pinch Pensey's Cinnamon
1/3 cup hot water
4 cups milk
3/4 tsp vanilla extract
DIRECTIONS
Mix sugar, cocoa, salt, and cinnamon in a sauce pan; stir in water. Cook and stir over medium heat until mixture boils; boil and stir 3 minutes. Stir in milk and heat. DO NOT BOIL. Remove from heat; add vanilla. Pour into mugs and add a large tablespoon whipped cream; sprinkle with cocoa or nutmeg to garnish!
–Melanie
Saturday, July 7, 2012
Molten Lava Cakes
Last summer Nick discovered the show Master Chef. Nick and I love this show (Surprisingly Nick likes it even more than me!). Anyway, the other week for one of their challenges they had to make a chocolate lava cake cooked to perfection. They have to make everything from memory but luckily I had a recipe from ourbestbites.com to follow but of course I altered it just a bit and made it smaller since this type of dessert is to be eaten right away. It is pretty much the best dessert because you have the chocolate, brownie batter (I LOVE batter... always leave extra in the bowl), ice cream, and fruit! These are individual molten lava cakes for two! If you are not up for a big dessert I suggest splitting because Warning or (to those like me) Good News: very rich!
INGREDIENTS
2 Tbsp butter
1/6 c sugar
2 medium eggs
1/6 c flour
1/8 tsp salt
2/3 c semisweet chocolate chips
DIRECTIONS
Preheat oven to 400 degrees. Grease 2 ramekins with butter using wax paper. Sprinkle with granulated sugar to coat the entire surface of the ramekin and discard extra sugar.
In a medium sized bowl beat the butter and sugar until fluffy. Add eggs one at a time, beating well. Slowly add flour and salt and mix until just combined.
Melt chocolate chips in microwave in 30 second increments until melted. Add melted chocolate to mixture. Divide batter evenly among prepared ramekins and then place on a baking sheet. Fill about 3/4 full.
Place baking sheet with ramekins in oven and bake for 10-12 minutes.
Run a sharp knife along the edge of the ramekin and then invert cake onto a plate. Dust with powdered sugar and top with whipped cream or vanilla ice cream and fresh fruit. (You can also just eat it right out of the ramekin.)
INGREDIENTS
2 Tbsp butter
1/6 c sugar
2 medium eggs
1/6 c flour
1/8 tsp salt
2/3 c semisweet chocolate chips
DIRECTIONS
Preheat oven to 400 degrees. Grease 2 ramekins with butter using wax paper. Sprinkle with granulated sugar to coat the entire surface of the ramekin and discard extra sugar.
In a medium sized bowl beat the butter and sugar until fluffy. Add eggs one at a time, beating well. Slowly add flour and salt and mix until just combined.
Melt chocolate chips in microwave in 30 second increments until melted. Add melted chocolate to mixture. Divide batter evenly among prepared ramekins and then place on a baking sheet. Fill about 3/4 full.
Place baking sheet with ramekins in oven and bake for 10-12 minutes.
Run a sharp knife along the edge of the ramekin and then invert cake onto a plate. Dust with powdered sugar and top with whipped cream or vanilla ice cream and fresh fruit. (You can also just eat it right out of the ramekin.)
Topped with bananas and a side of French Vanilla Tillamook ice cream (best ice cream but only sold in Utah at WinCo).
Check out that chocolate lava! Although my cake didn't collapse by itself on the plate the lava should be a smidgen thicker. Next time I'll cook it another minute longer.
–Melanie
Subscribe to:
Posts (Atom)